Braided Pie
In three flavors: apple-honey, pumpkin-cream cheese, and dulce de leche-chocolate-pecan

I maybe don’t need to mention again that I’m not much of a pie baker. I find the process lengthy and somewhat cumbersome and the results rarely what I want them to be. That’s why when Thanksgiving rolls around each year, I like to focus my attention on the main meal rather than the dessert. It’s the one day of the year when baking is not my priority.
This year however, I’ve been thinking about and riffing on a (mock) braiding technique that I’ve grown fond of in bread baking. It turns out this technique works quite well with pastry dough and creates pretty little pies with harmonious crust-to-filling ratios. It’s also a sure bet against a soggy bottom, the bane of any pie baker’s well intentioned efforts.
So if you’re like me, and you approach pie baking with some trepidation, I would encourage you to give this technique a try with any of the three filling choices I’ve included below. I think you’ll find the process rather fun and efficient.
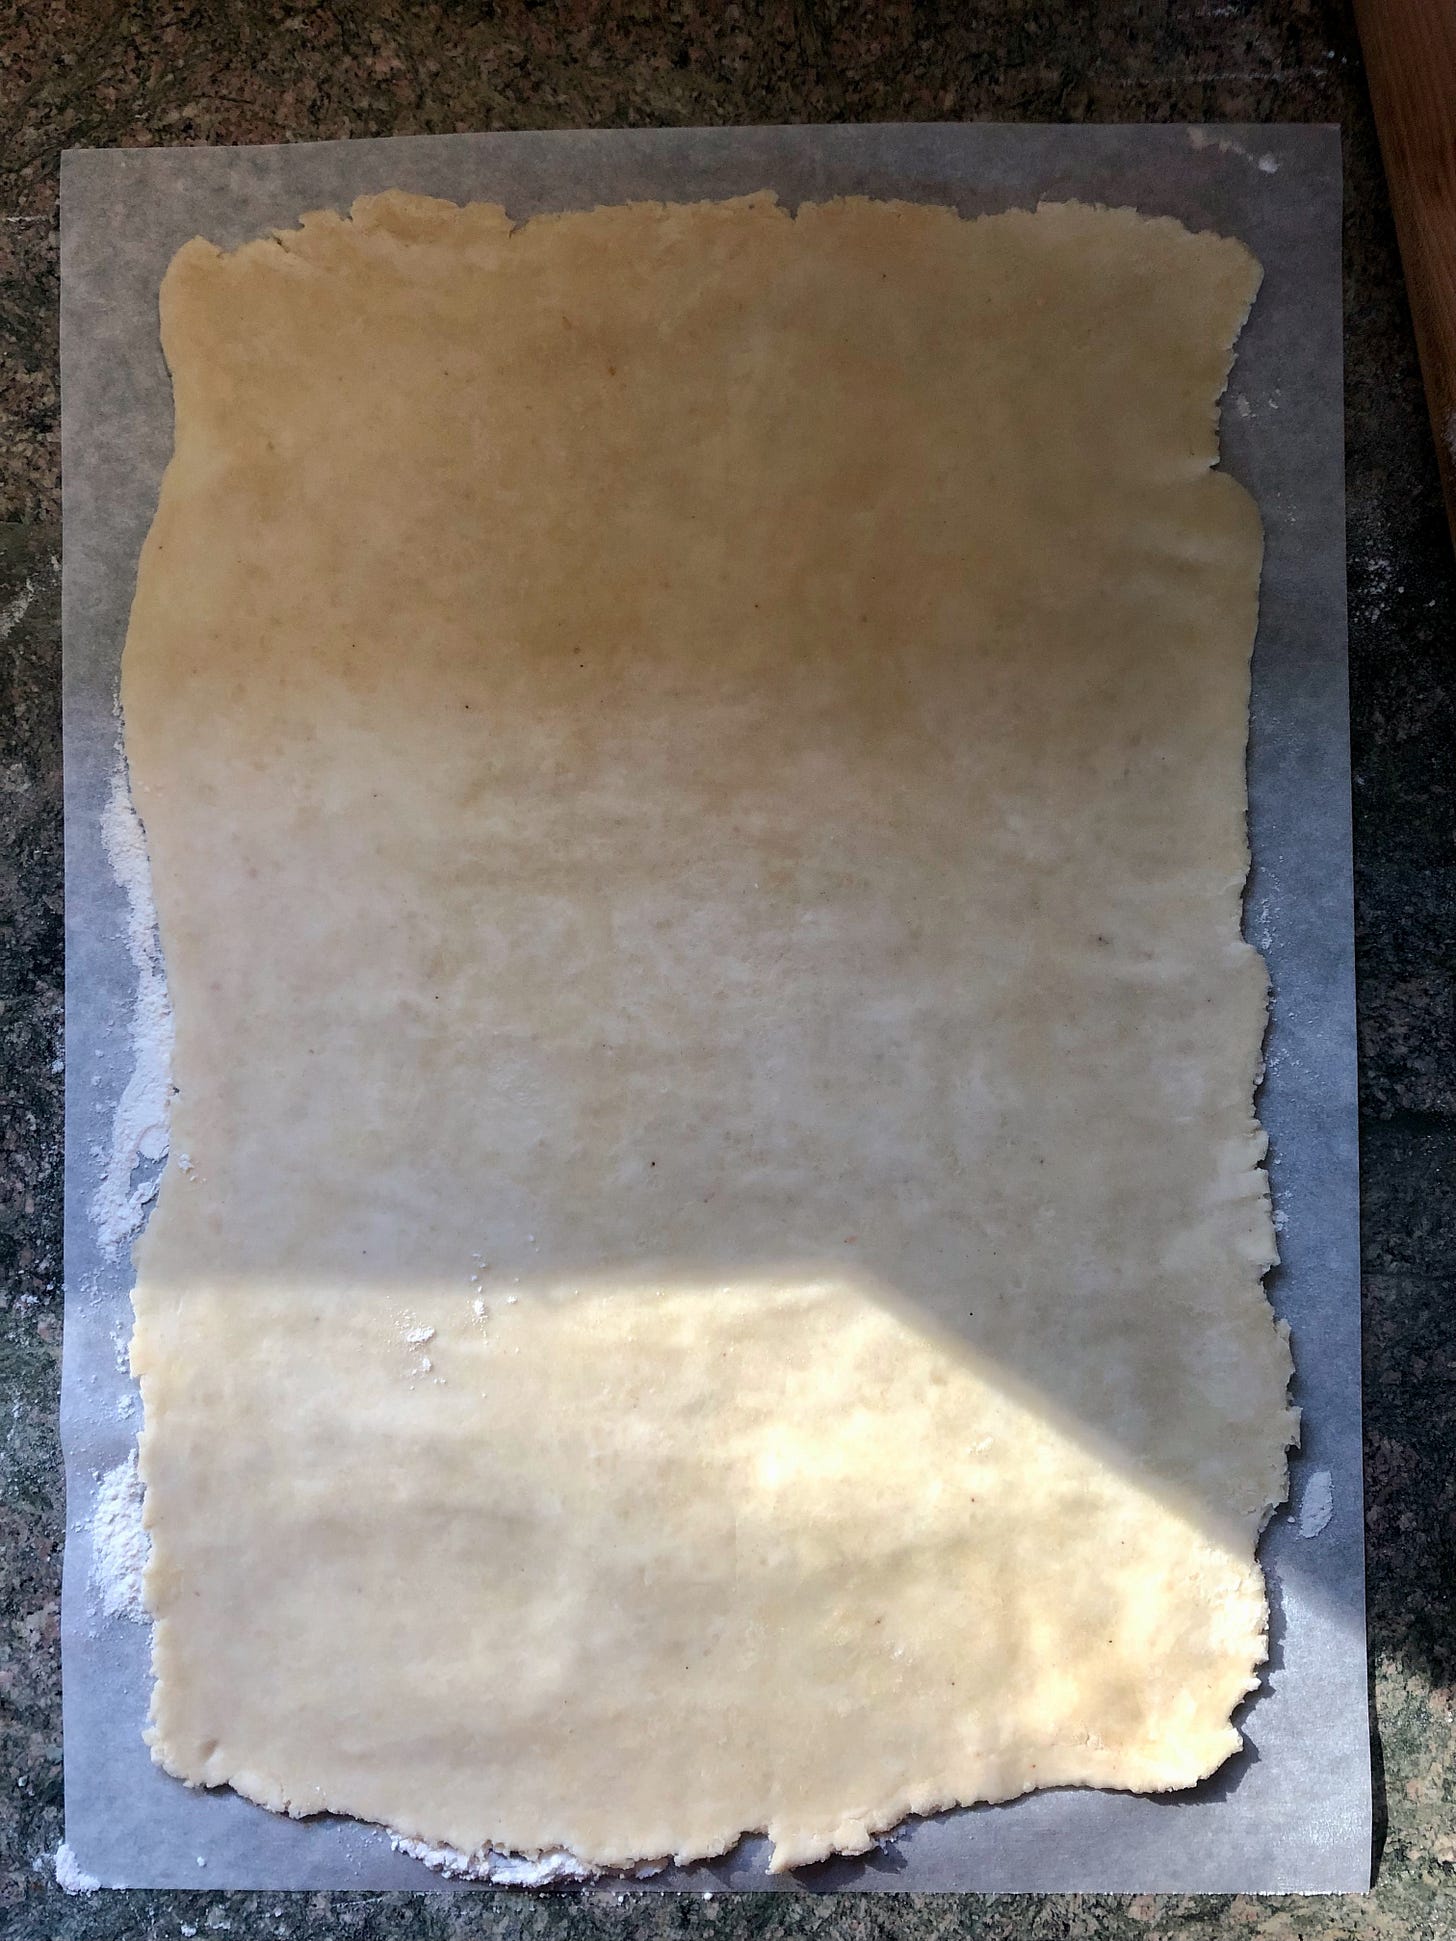
Note: I’ve included a recipe for the pie pastry first1, but if you already have a household pie crust recipe that you’re pleased with, feel free to use that and skip directly to the fillings. You’ll want to be sure your pastry recipe is for a single-crusted pie; or, if it’s a double crust recipe, to use only half of it. In either case, make sure you also shape the dough into a rectangle rather than a disk before refrigerating it. That’ll make your life a lot easier when it comes time to roll out the dough.
Here is the printable version of the pie pastry and three braided pie recipes.
I also made a little time-lapse video tutorial if that helps the more visual learners.
Pie Pastry (Single Crust)
Active time: 15 minutes
Inactive time: 1 hour
Total time: 1 hour 15 minutes
Yield: one single pie crust

Flakey and tender — yet remarkably unfussy to achieve — this pastry is rich in butter and nutty whole grain flavor. While the whole grain flour can be replaced with more all-purpose flour, I definitely recommend experimenting with your favorite flour options. The ones listed below are just some of the varieties I’ve tried.

Pastry
- 1 cup (120g) unbleached all-purpose flour
- 1/2 cup (55g to 60g) whole grain flour (like wheat, einkorn, rye, spelt, etc…) or all-purpose flour
- 1/2 teaspoon fine salt
- 8 tablespoons (113g) cold unsalted butter
- 2 tablespoons (28g) cold water

1. To make the pastry: Combine the flour and salt in a large bowl.
2. Cut the butter into 1/2" cubes and toss about 2/3 (~75g) of the cubes in with the dry ingredients. Using both hands, press the cubes between your thumbs and fingers to work and rub the butter into the dry ingredients until the mixture is evenly crumbly and sandy in texture; there should be no larger chunks of butter visible. The mixture will clump together when you squeeze it.
3. Add the remaining butter cubes, pressing them again between your thumbs and fingers to create larger flakes and pea-sized pieces of butter. Don’t work the butter in more than that.
4. Drizzle in the water and — with your fingers, a fork, or a dough scraper — swiftly work it in until the mixture is evenly moistened and starts to clump together. If the dough doesn’t seem like it’ll come together (this will depend on humidity levels and the type of whole grain flour you use), drizzle in the remaining water a teaspoon at a time until you can bring the dough together into a shaggy mass.
5. Place the dough on a lightly floured work surface, and use your hands to gather and press it into a rough rectangular shape. With a rolling pin, roll the dough out into a flattened rectangle then fold the short ends towards the center like a business letter. If pieces of the dough fall off, just gather them into the main mass and keep working.
6. Repeat this rolling out and letter-folding process one more time. At this point the dough should hold together nicely and you should have a relatively smooth-edged rectangle.
7. Wrap the dough in plastic and refrigerate it for at least 1 hour before making your pie.
Braided Apple-Honey Pie
Active time: 20 minutes
Baking time: 30 to 35 minutes
Total time: 50 minutes
Yield: one 12”-long pie (6 to 8 servings)

With a hint of honey flavor and a secret ingredient (shhh, it’s the graham cracker crumbs), this is not your ordinary apple pie filling. The crumbs absorb some of the juices from the spiced, honey-doused apples and prevent the bottom of the pie from getting soggy. They are relatively essential, but if you don't have them, you could just as easily substitute other complementary cookie crumbs or plain dried bread crumbs in this strudel-inspired pie.

- 3/4 pound Honeycrisp apples — about 1 1/2 large, 2 medium, or 3 small
- 1 teaspoon lemon juice
- 2 tablespoons (42g) honey
- 3/4 teaspoon cinnamon
- 1/8 teaspoon nutmeg
- 1/8 teaspoon allspice
- 1/8 teaspoon salt
- 2 tablespoons graham cracker crumbs
- 1 tablespoon (14g) unsalted butter, optional
- milk and coarse sugar (demerara, turbinado, sparkling, etc…), for topping

1. To prepare the apple filling: Peel, quarter, and core the apples. Then cut them into 1/8" to 1/4"-thick wedges and cut the wedges crosswise into 2 or 3 pieces, depending on how big your apples are; the goal is to have 1” long pieces.
2. Toss the apples with the lemon juice followed by the honey, cinnamon, nutmeg, allspice, and salt. Set aside.
3. Position a rack in the center of the oven and preheat the oven to 400°F when you’re ready to assemble the pie.
4. To assemble the pie: Lay a piece of parchment paper that’s at least 16” x 12” in size on a clean work surface. Dust the parchment lightly with flour.
5. Place the chilled dough on the parchment and roll it out into a 10” x 15” rectangle; the dough will be less than 1/8" thick.
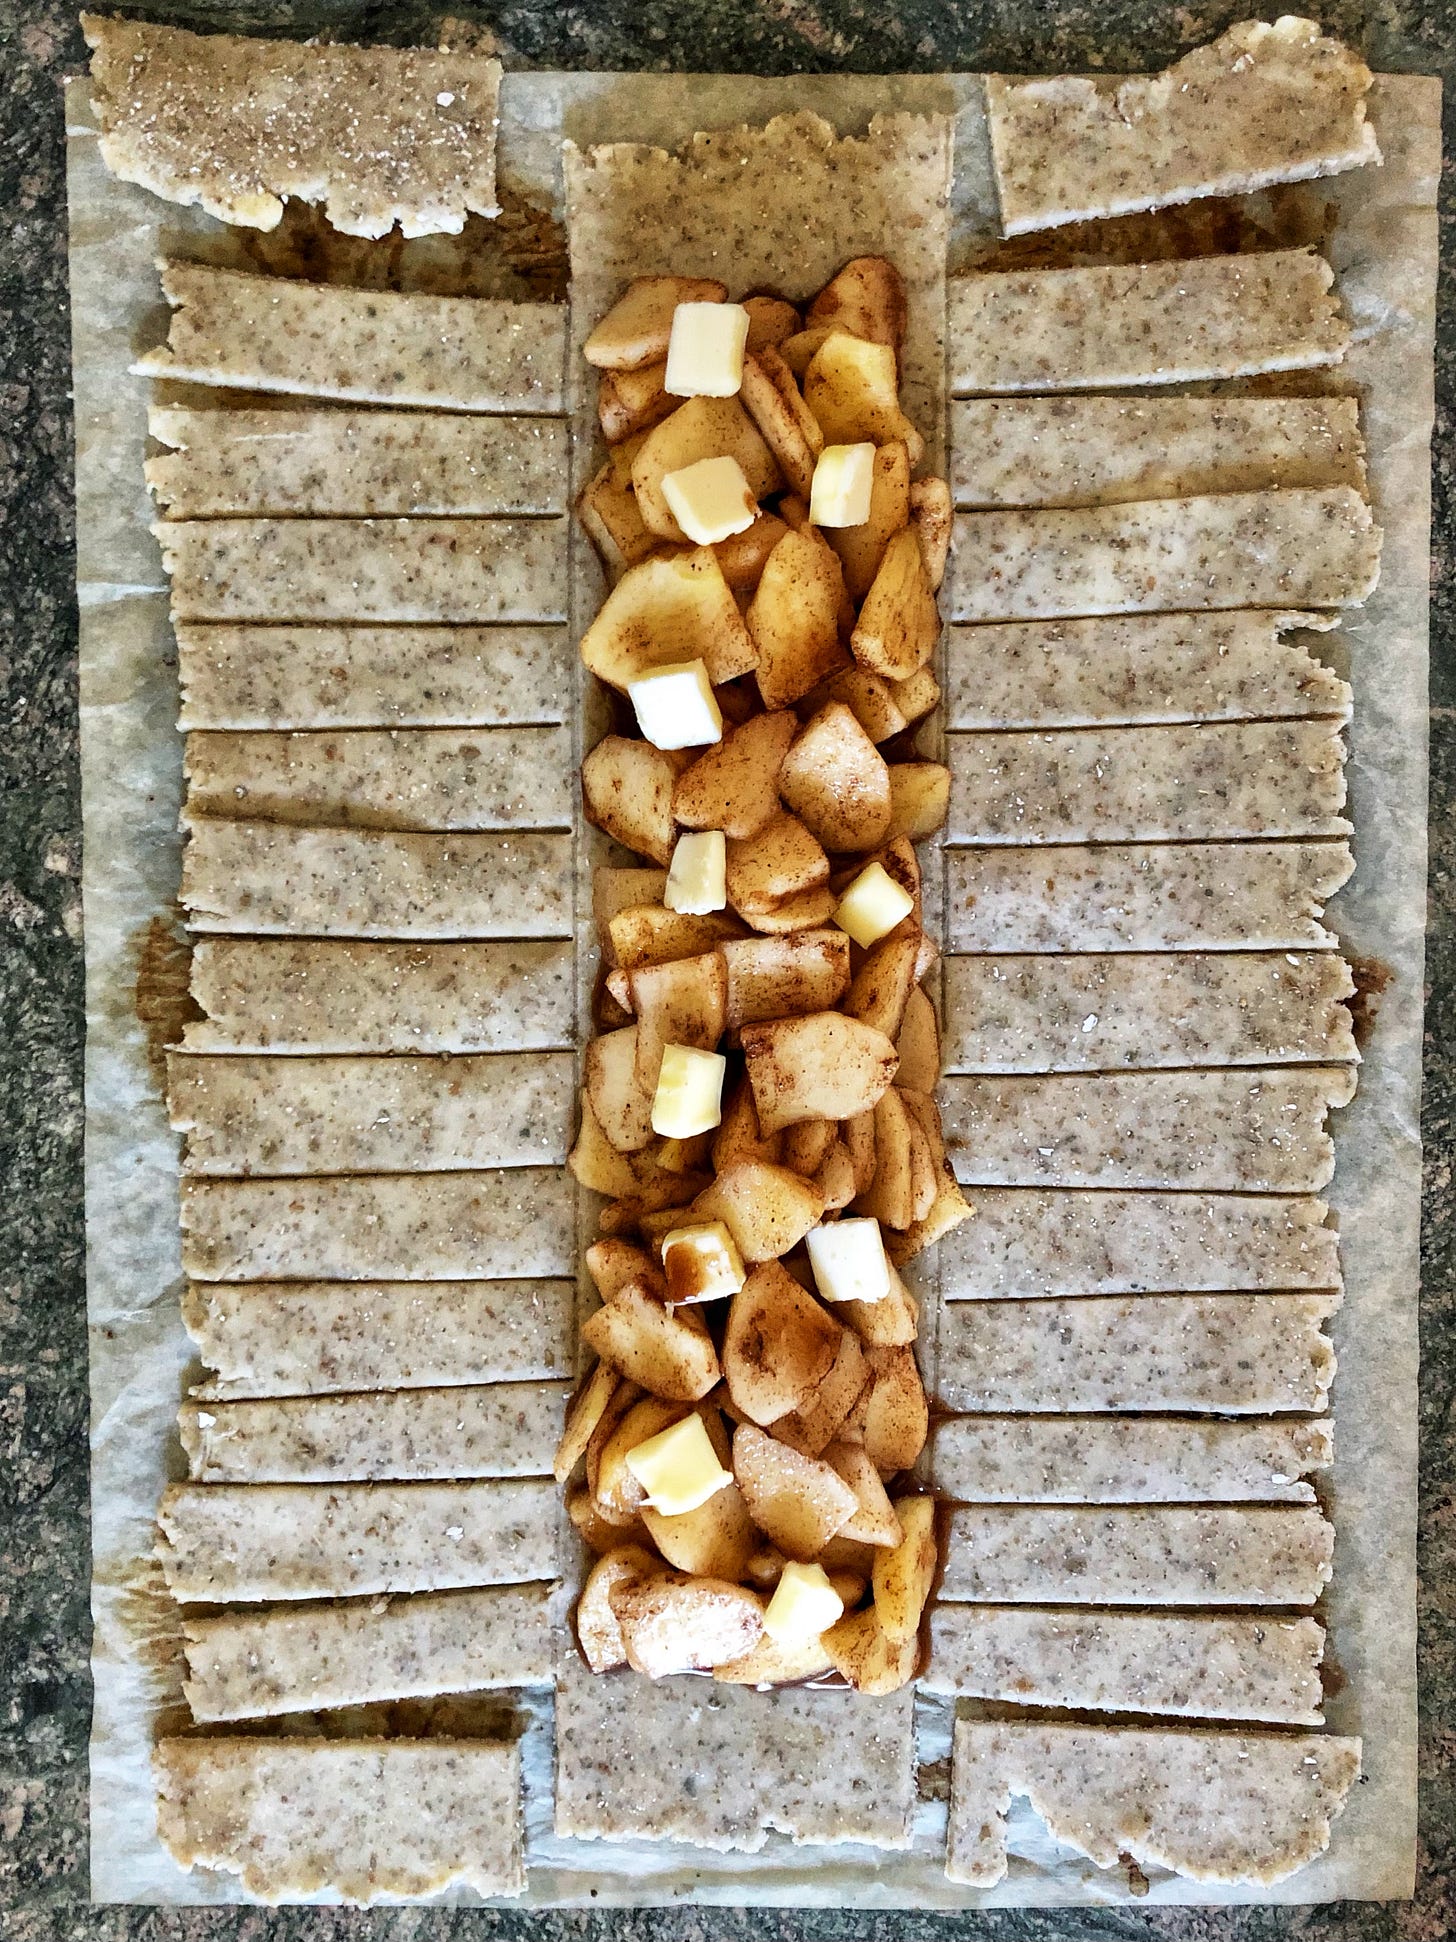
6. With a bench scraper or the back of a chef’s knife, lightly score the dough lengthwise into equal thirds.
7. Cover the center strip of dough (between the score marks) with a thin, even layer of the graham cracker crumbs, leaving about 1 1/2" section of dough uncovered at both short ends of the strip.
8. Scoop the apples onto the graham cracker crumbs then drizzle the remaining juices from the bowl onto the apples.
9. If using, cut the tablespoon of butter into small 1/4"-thick pats and scatter them over the apples.
10. With a knife or a bench scraper, cut away a 1 1/2" x 3 1/4" rectangle from the four corners of the dough. Then, fold the resulting flap of dough at either end over the filling.
11. Working down one side of the pie, make crosswise cuts every 1” to 1 1/4" from the edge of the filling to the outer edge of the dough; you’ll end up with 11 to 12 strips of dough. Repeat the same cuts down the other side of the pie, ensuring you end up with the same number of strips on both sides.
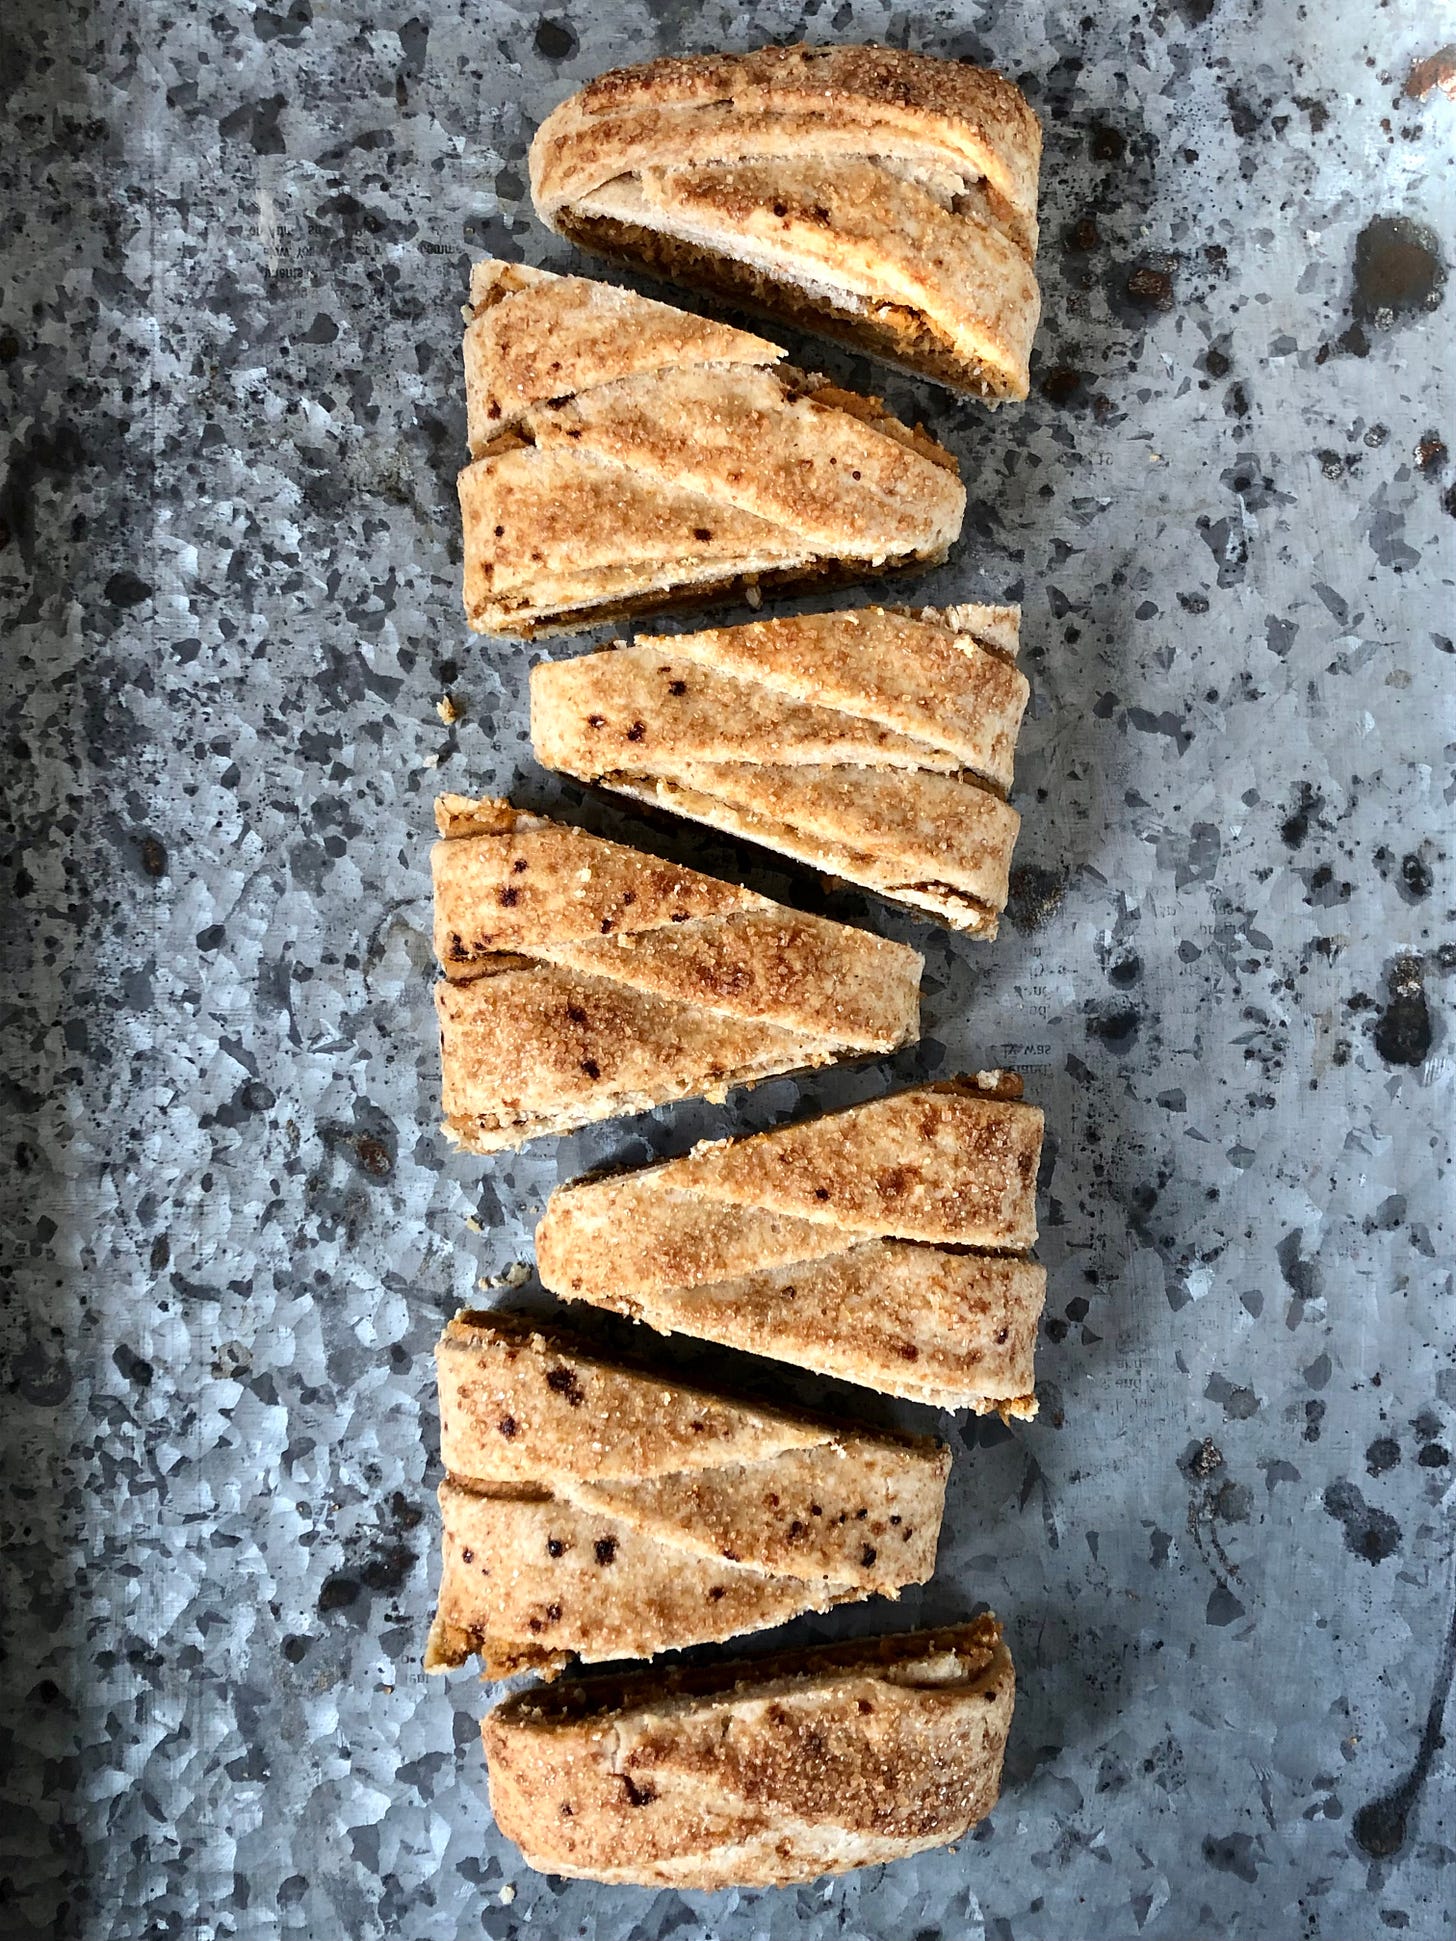
12. Brush the strips with milk then, alternating sides, braid (or diagonally overlap) the strips across the center filling all the way down the length of the pie. Be sure the strips crisscross one another in the same pattern/order the whole length.
13. Brush the top of the dough with milk and sprinkle over the coarse sugar.
14. Bake the pie for 15 minutes, rotate the pan and bake until the top of the pie is golden brown and the juices are bubbling through the cracks, 15 to 20 minutes longer.
15. Remove the pie from the oven and allow it to cool and set before serving.
Braided Pumpkin-Cream Cheese Pie
Active time: 15 minutes
Baking time: 30 to 35 minutes
Total time: 45 minutes
Yield: one 12”-long pie (6 to 8 servings)

Perhaps pumpkin is your pie of choice when autumn rolls around. If so, this soft, mousse-like pumpkin spiced filling with a hint of cream cheese tang could be right up your alley. The filling is both light in texture and rich in flavor and pairs beautifully with a tender crust enhanced with a nutty whole wheat, spelt, or einkorn flour.

- 3 ounces (85g) cream cheese, at room temperature
- 1/3 cup (71g) light brown sugar, packed; or 1/2 cup (78g) maple sugar
- 1/3 cup (75g) pumpkin purée
- 2 tablespoons (15g) all-purpose flour
- 1/2 teaspoon ginger
- 1/2 teaspoon cinnamon
- 1/8 teaspoon nutmeg
- 1/8 teaspoon clove
- 1/8 teaspoon salt
- milk and coarse sugar, for topping

1. To make the pumpkin-cream cheese filling: With a hand or stand mixer fitted with a whisk attachment, whip the cream cheese and brown (or maple) sugar together until smooth. Scrape the bowl then add the pumpkin, flour, spices, and salt and whip briefly until evenly incorporated.
2. Proceed with the oven prep and pie assembly instructions given in the apple version (starting with step 3), spreading the pumpkin cream cheese filling in an even layer down the center strip of the dough in place of the graham cracker crumbs and apples (steps 7-9).
Braided Dulce de Leche and Chocolate Pecan Pie
Active time: 15 minutes
Baking time: 30 to 35 minutes
Total time: 45 minutes
Yield: one 12”-long pie (6 to 8 servings)

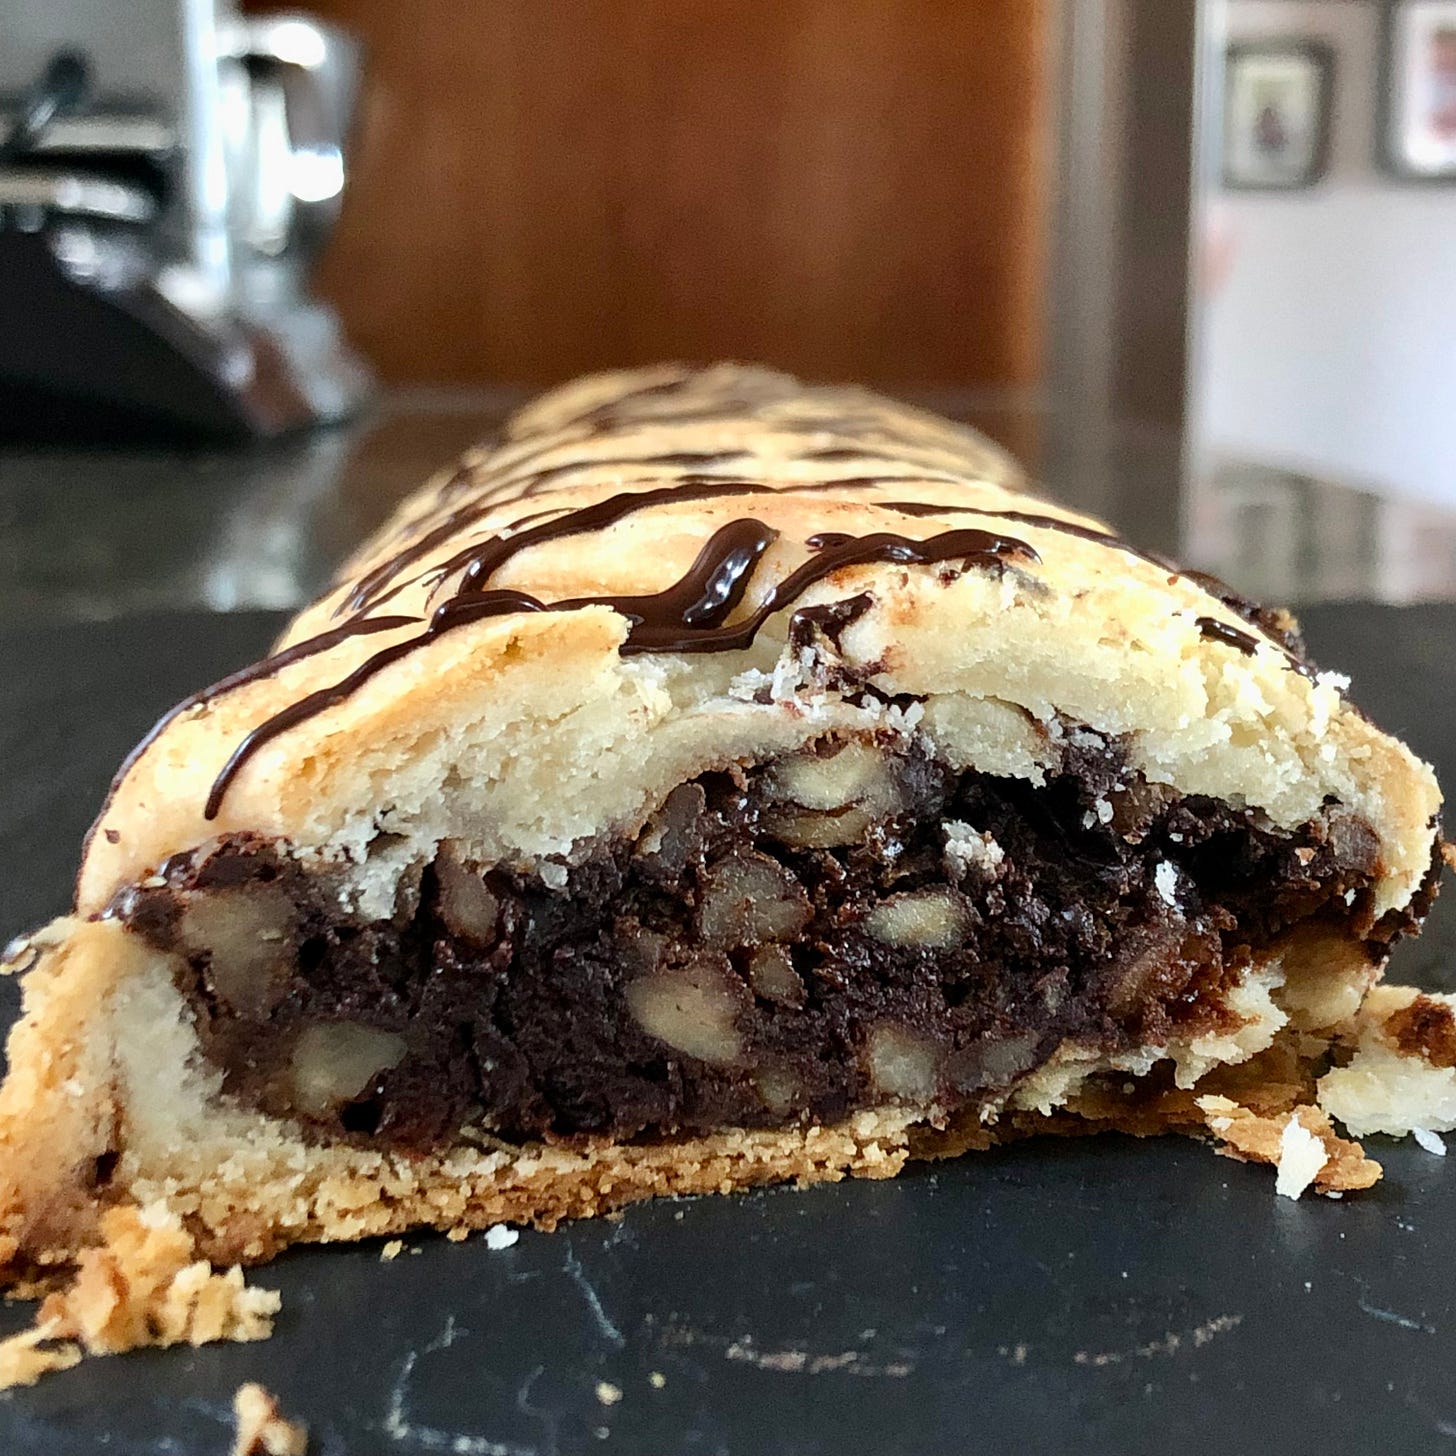
Another highly flavorful filling, this dulce de leche based version of pecan pie is as rich as they come (think gourmet chocolate enrobed in buttery pastry). The toasted pecans add an extra layer of flavor, while the bittersweet chocolate balances out the sweetness of the dulce de leche.

- 1/2 cup (150g) dulce de leche
- 3 ounces (85g) bittersweet chocolate, chopped
- 1 cup (113g) chopped pecans, toasted
- milk or egg wash (1 large egg mixed with 1 tablespoon water), for brushing
- melted bittersweet chocolate, for drizzling; optional

1. To make the dulce de leche, chocolate, and pecan filling: Mix together the dulce de leche, chocolate, and pecans until evenly incorporated.
2. Proceed with the oven prep, pie assembly, and baking instructions given in the apple version (starting with step 3), carefully spreading the stiff dulce de leche, chocolate, and pecan filling in an even layer down the center strip of the dough in place of the graham cracker crumbs and apples (steps 7-9).
3. Before baking, brush the pie with milk or egg wash.
4. To embellish the look of the pie, drizzle a little melted dark chocolate over the top once it has come out of the oven and cooled fully.
Whether you make one, all, or none of these pies, I hope you’ve found a bit of inspiration in these recipes. You could adapt (double or triple) any of these fillings to fill a more traditional 9” round pie, or you could play around with your own braided pie fillings and pastry to create a recipe all your own. No matter what, have fun and bake joyfully.
If you know someone who could use a little pie inspiration this season, please do share this post with them. Feel free to ask questions in the comments, and click the ❤️ if you’re so moved. It adds recognition to my work, but more than that it brings connection to this growing community we have going here.
Best,
Charlotte
This pastry is inspired by the pie dough recipe I follow rather religiously from the Zingerman’s Bakehouse cookbook by Amy Emberling and Frank Carollo. Incorporating most of the butter fully into the dry ingredients first, coats the flour thereby preventing gluten strands from forming. This results in short, tender pastry. The larger pieces of butter create pie crust’s signature flakiness.


